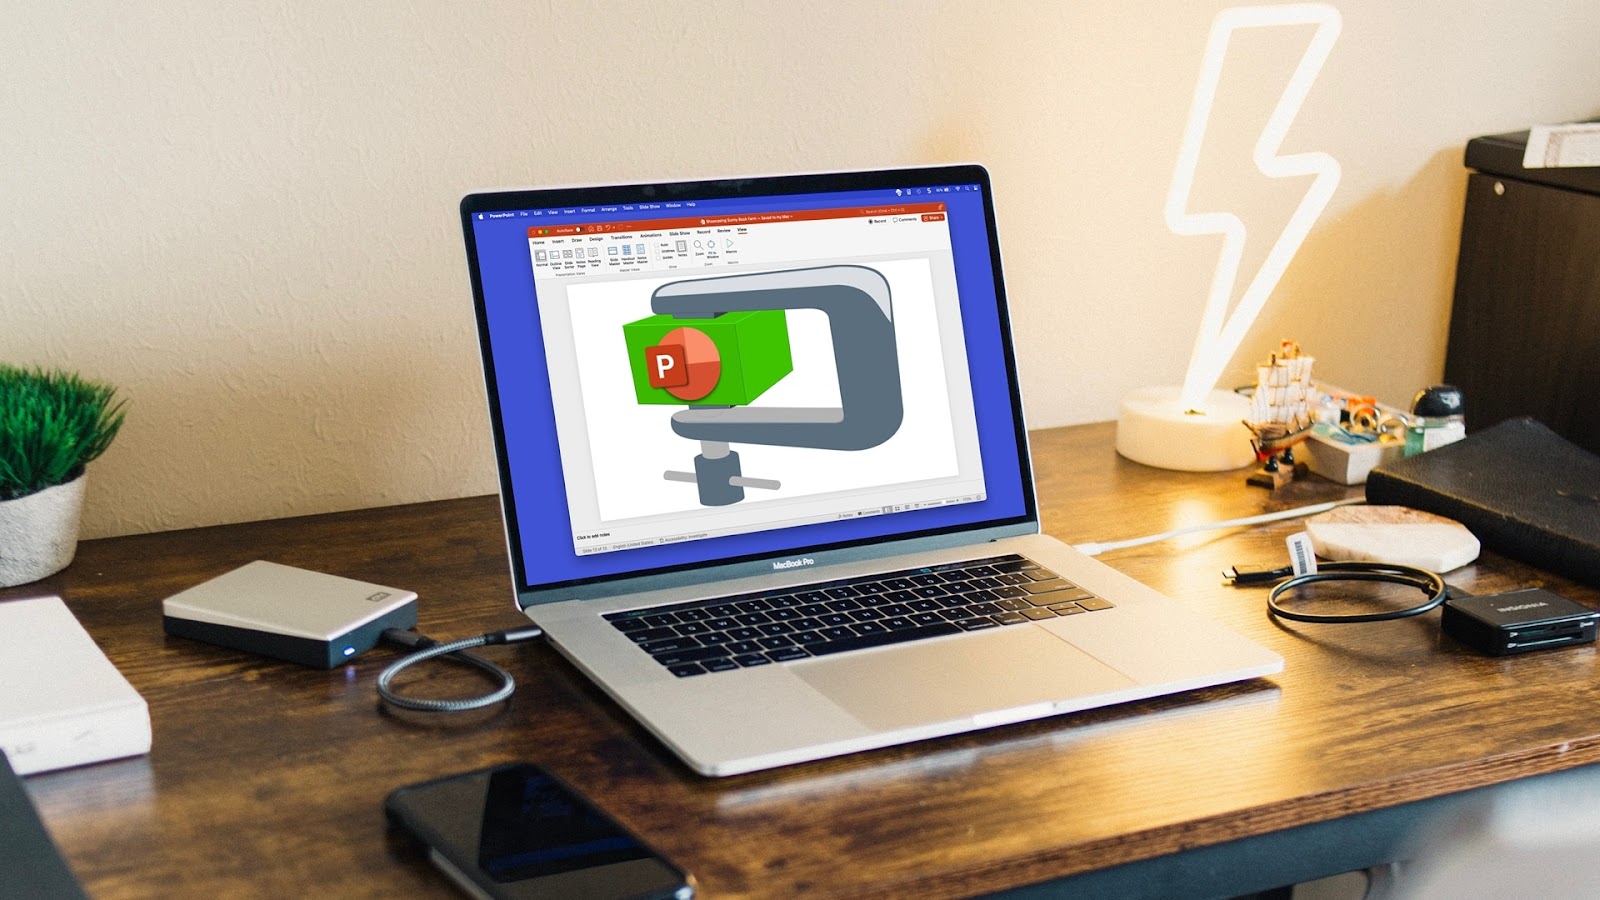
If you want to send or share your PowerPoint presentation and realize that the file size is enormous, you’re not stuck. You have ways to reduce the file size from compressing media to lowering the resolution to zipping the final file.
We’ll show you how to compress a PowerPoint slideshow using a handful of methods. Additionally, we’ll explain how Plus AI can help you edit your presentation to maintain its appearance and purpose.
{toc}
View the PowerPoint file size
Before you begin making adjustments, you can check the size of your file easily on both Windows and Mac. This is good for comparing it to the updated size after you reduce it.
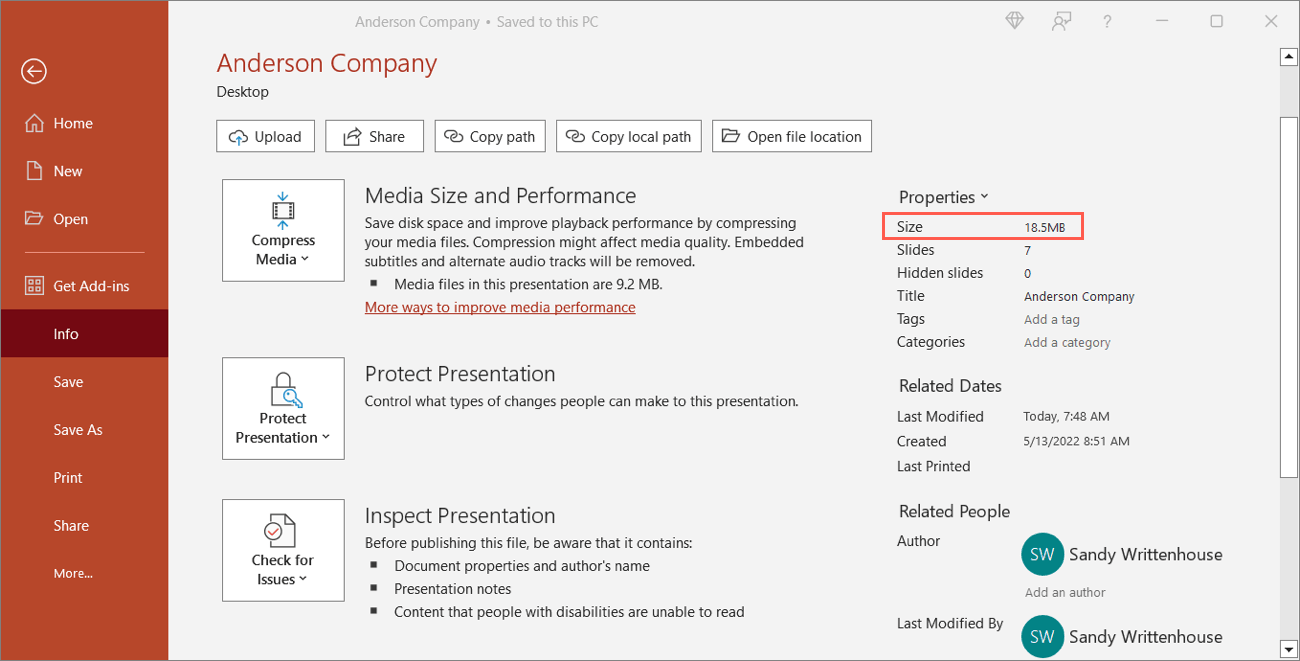
In PowerPoint on Windows, select File > Info. You’ll see the file size on the right below Properties.
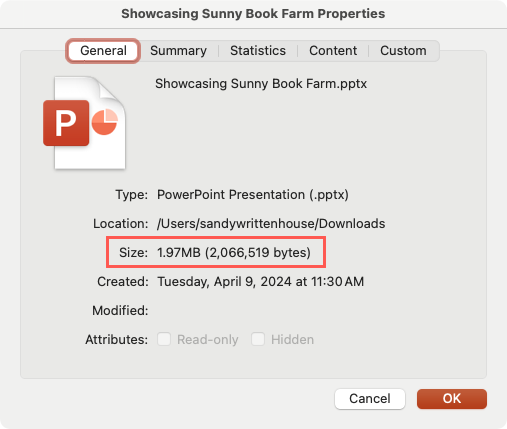
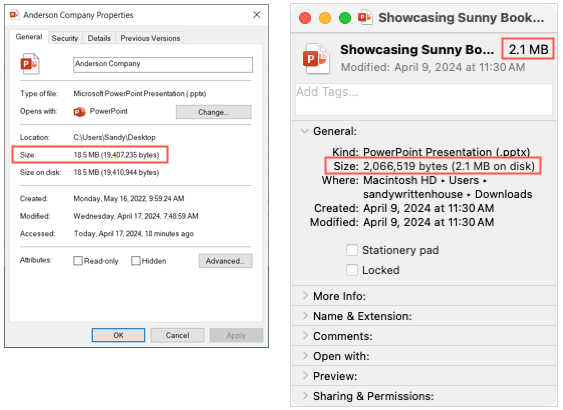
In PowerPoint on Mac, select File > Properties in the menu bar. Go to the General tab in the pop-up window and you’ll see the Size in the list of details.
If you don’t have the slideshow open, you may also see the size if you display this property in the PowerPoint file’s containing folder.
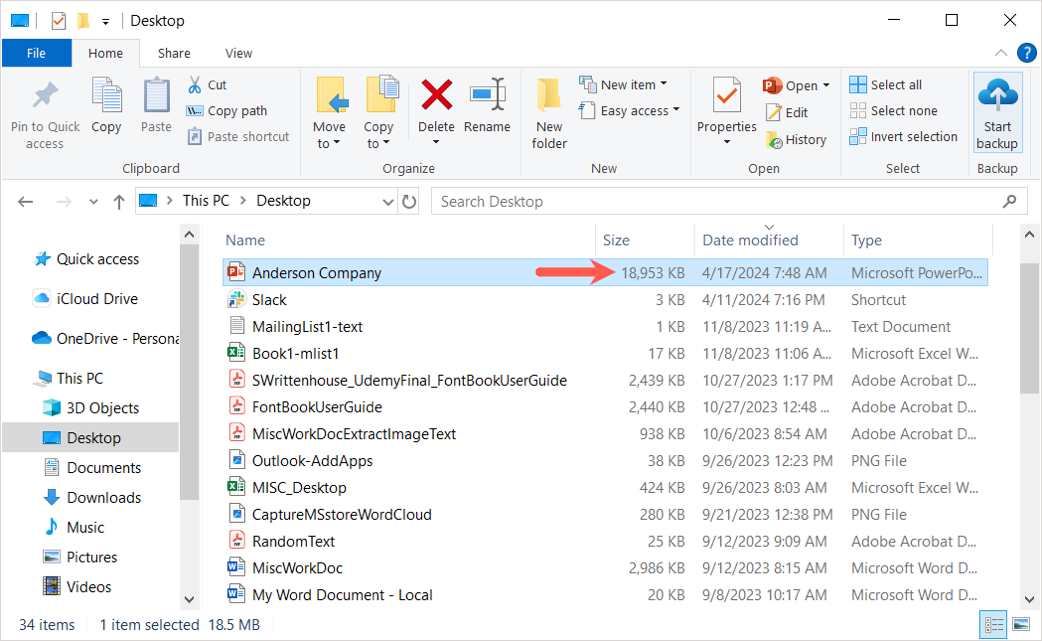
If you don’t see the size in the folder, right-click and choose Properties on Windows or Get Info on Mac. Then, look for the Size property in the pop-up window.
How to compress a PowerPoint presentation
Now that you know the size of your PowerPoint file, it’s time to get to work on reducing it. From making adjustments to the presentation itself to compressing the entire file when you finish, here are five ways to decrease the PowerPoint file size.
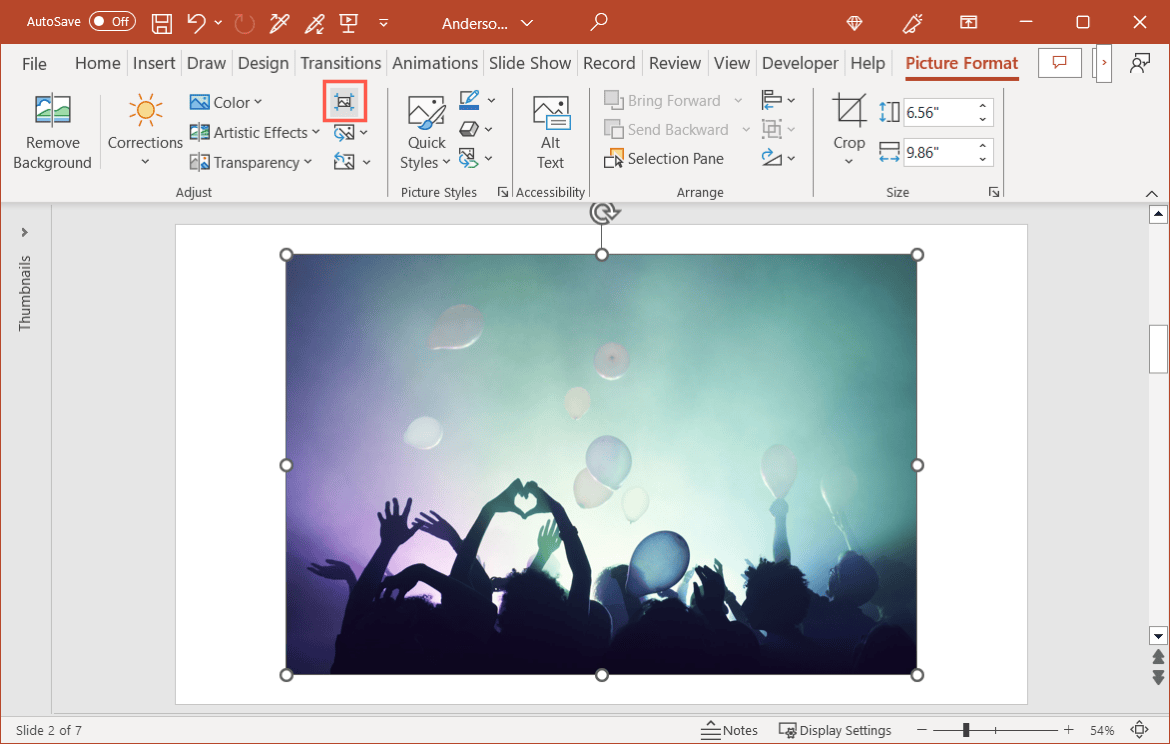
1. Compress images
One of the simplest ways to lower the size of your PowerPoint file is by compressing the images in the slideshow. You can do this for only particular pictures or for all of them, and it takes only a few steps.
- Select an image, go to the Picture Format tab, and click Compress Pictures in the Adjust section of the ribbon.
- In the pop-up window, use the checkbox for Apply only to this picture to choose whether to compress only that image or all images in the presentation.
- Optionally, check the box for Delete cropped areas of pictures. If you mark this option, any cropping changes you made to the image(s) are deleted to save space. Keep in mind, you cannot undo those edits again if you remove the data.
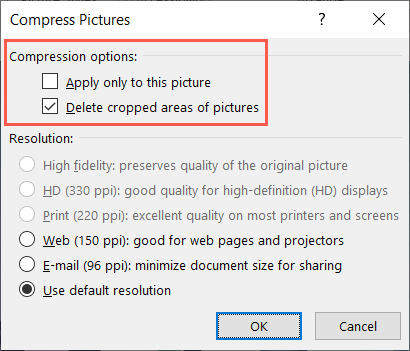
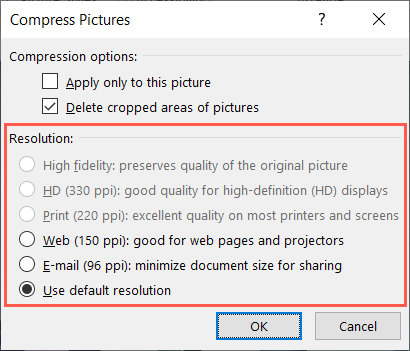
- Another optional setting is for the Resolution. You may see the Use default resolution option marked but can choose a different resolution to reduce the size further if you like. Just note that changing the resolution can affect the quality of the images.
- Click OK when you finish.
2. Compress audio and video files
If you have audio and video files in your slideshow, these types of media items can be quite large. Luckily, you can compress these similarly to images; however, the feature is only available on Windows, not Mac.
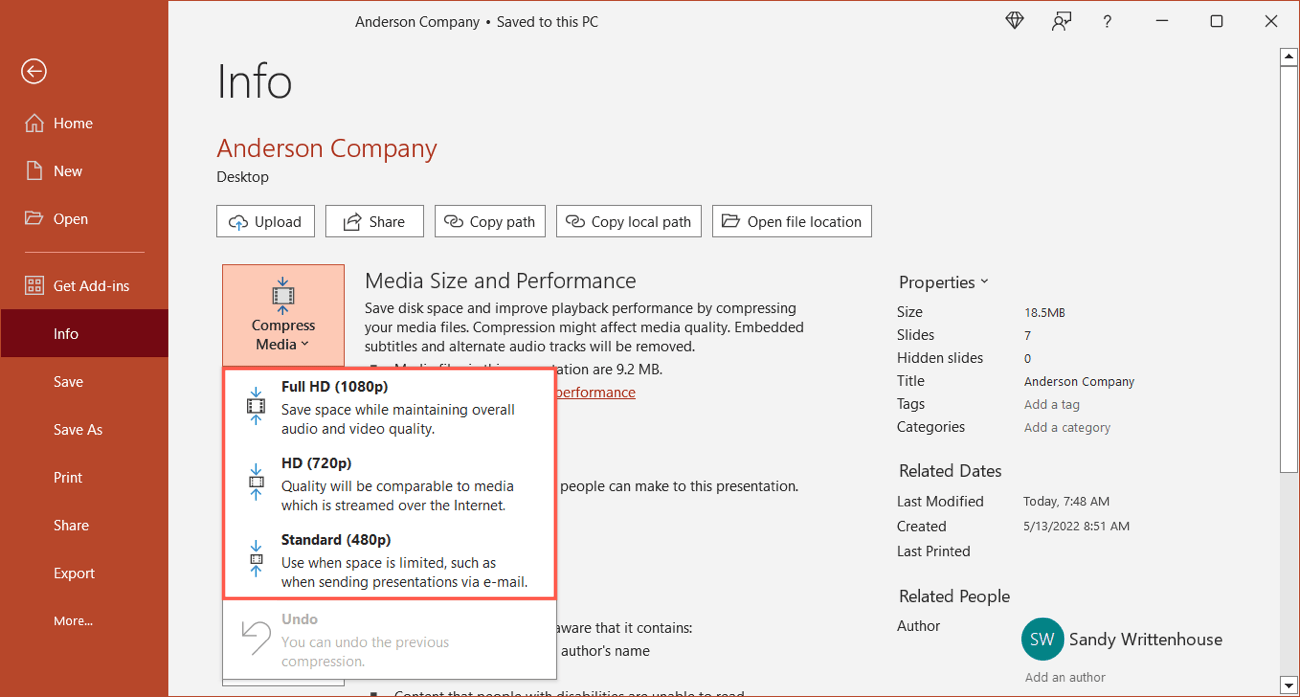
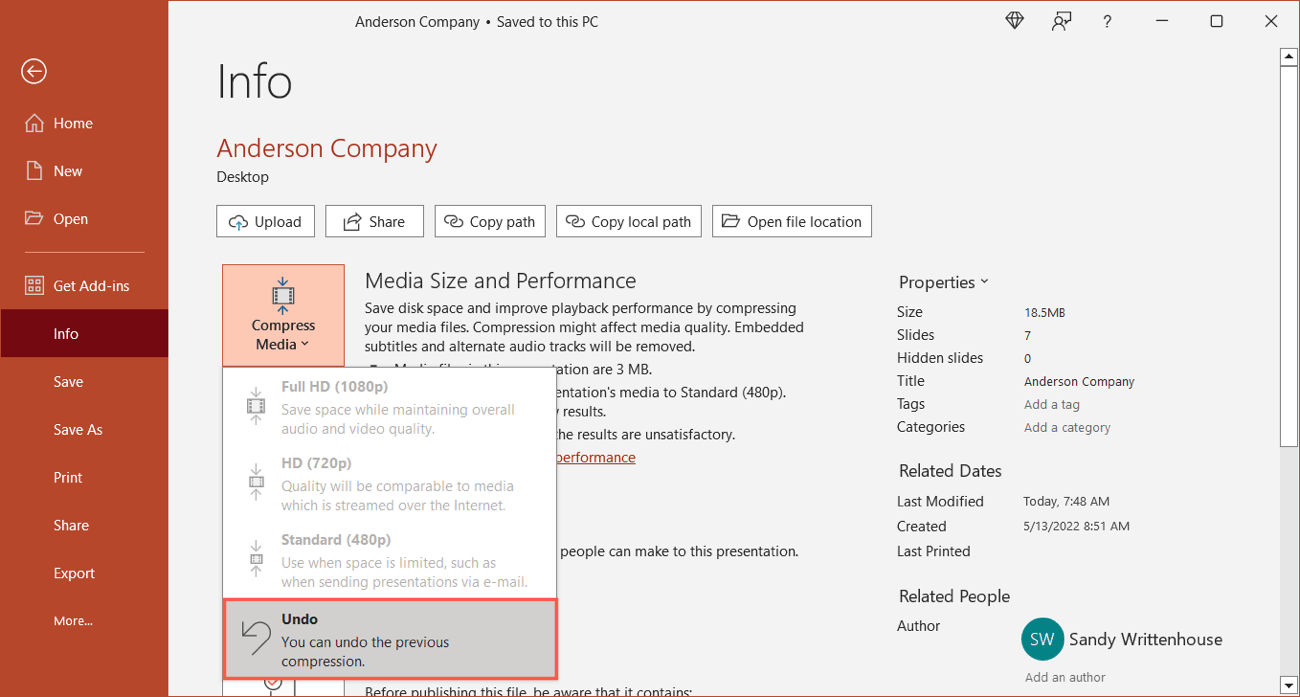
- Go to the File tab and pick Info.
- Open the Compress Media menu on the right. Note that you won’t see this menu unless you have an audio file or video in your slideshow.
- Choose from Full HD, HD, or Standard. You’ll see a description of each option so you can choose the one that best fits.
- After you choose the compression, you’ll see a pop-up window displaying the media that was compressed along with its slide number, initial size, new size, and the amount of space saved. Select Close when you finish reviewing the items.
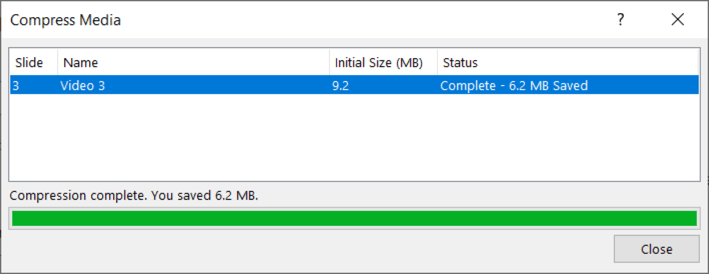
Once you compress the media, you’ll see an option to Undo the action at the bottom of the Compress Media menu. So, if you don’t like the results, you can revert the compression.
3. Remove image editing data and reduce the resolution
When you make changes to pictures and photos in your slideshow, PowerPoint stores those edits. This is what allows you to undo them if needed. You can reduce the overall file size by deleting this saved data if you’re sure you won’t need it.
Additionally, you can lower the resolution for images and conveniently, this setting in the same location.
As of this writing, these features are only available in PowerPoint on Windows.
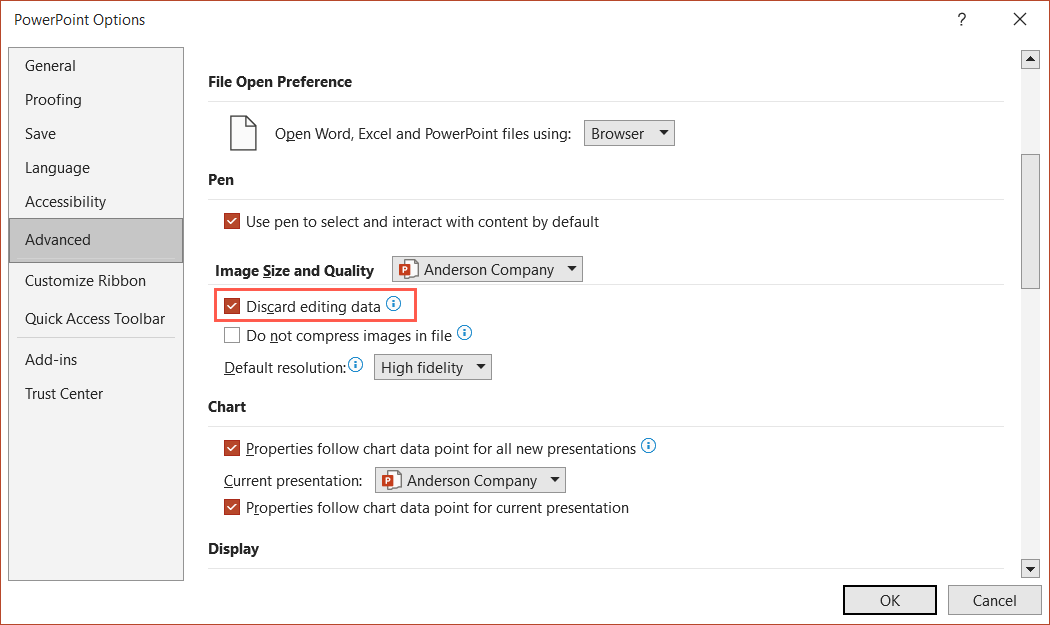
- Go to the File tab and select Options.
- Choose Advanced in the pop-up window and move to the Image Size and Quality section on the right.
- Check the box for Discard editing data.
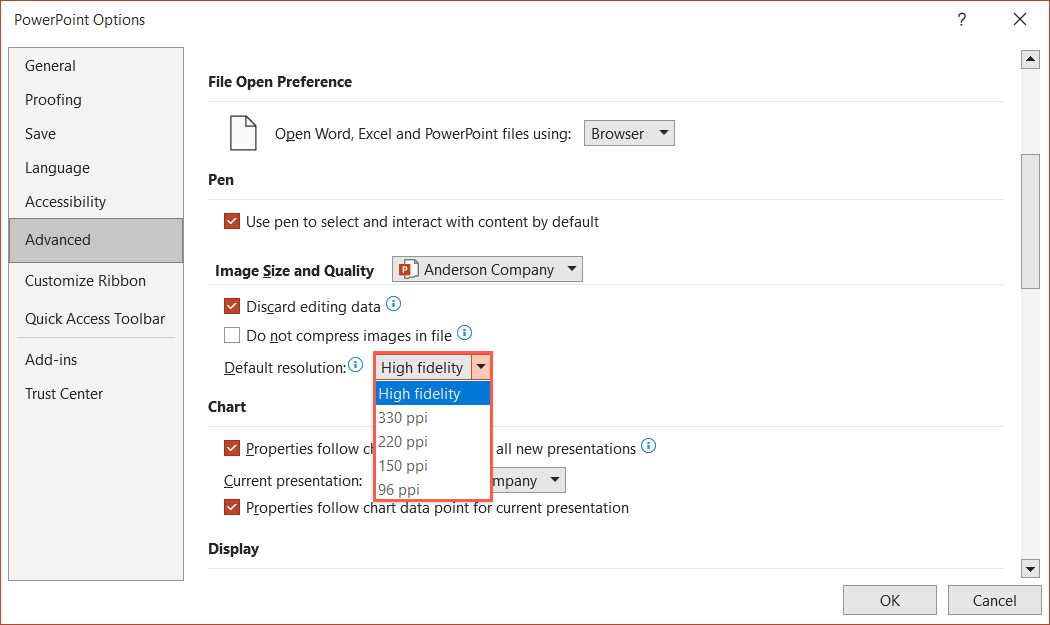
- Optionally, you can then adjust the Default resolution for images which can also reduce the file size. If set to High Fidelity, you can choose a different resolution from 96 ppi to 330 ppi. Just note that this can affect the quality of the images.
- Click OK to save your changes.
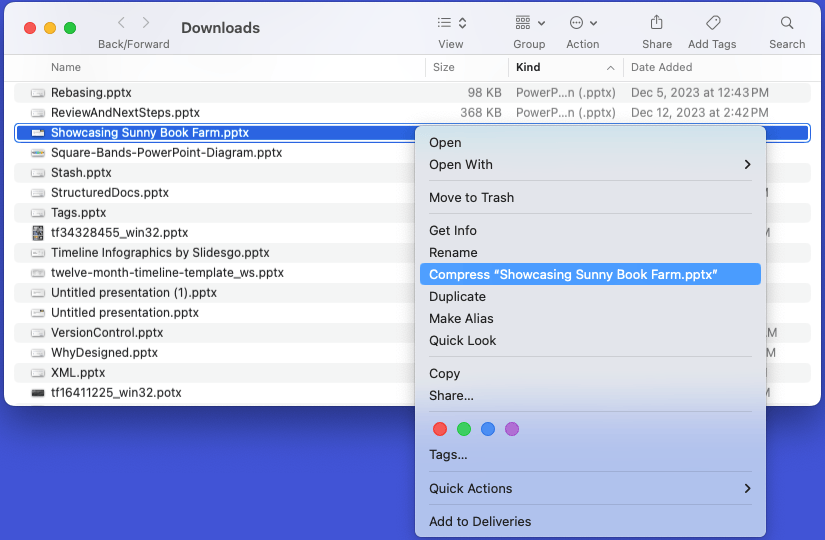
4. Compress the file as a ZIP
Once you make the above changes to reduce the size of your PowerPoint presentation, you can also lower the size by compressing the entire file itself. This is ideal if you plan to send the slideshow via email where large file sizes can inhibit the message from reaching its destination.
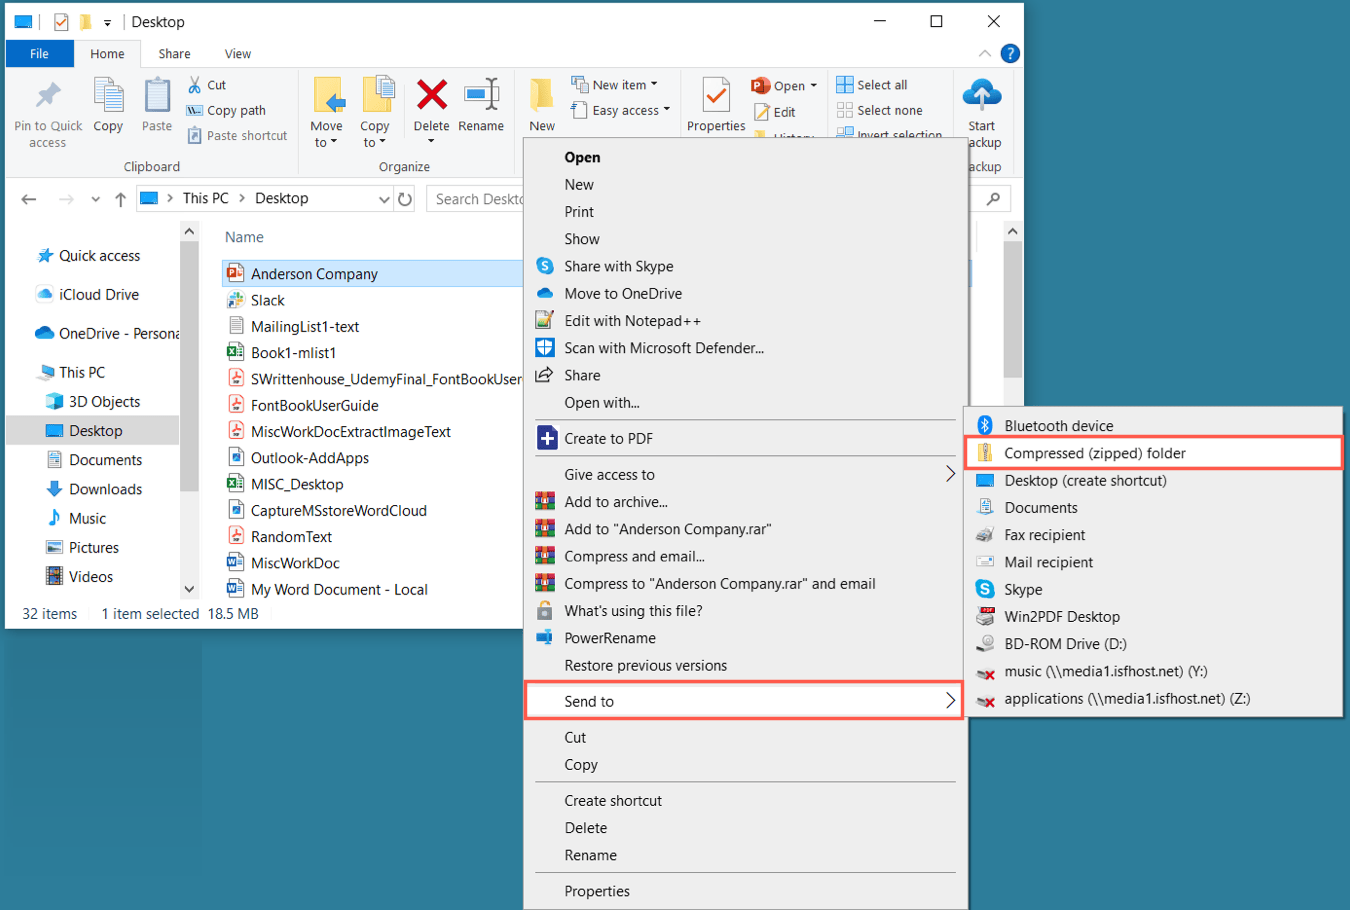
Do one of the following to create a ZIP file:
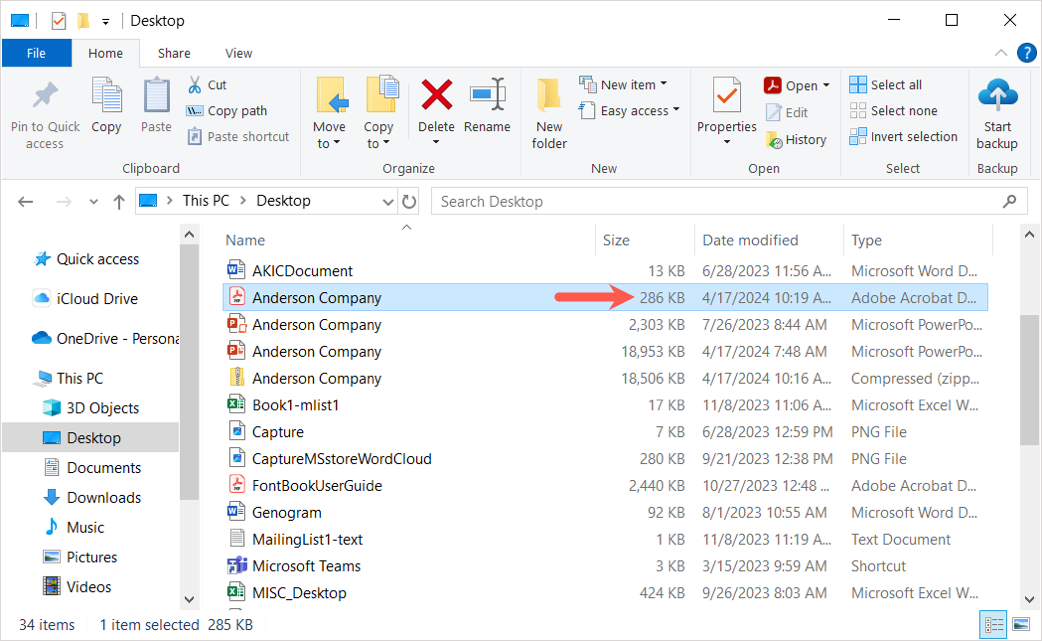
- On Windows, open the containing folder for the slideshow file. Right-click and choose Send to > Compressed (zipped) folder.
- On Mac, open the containing folder for the PowerPoint file. Right-click and choose Compress [file name].
You’ll then see the ZIP file in the same folder and with the same name. Depending on the length and elements in your presentation, plus what’ve you changed to reduce the file size, you may see a small or (hopefully) large amount of size savings.
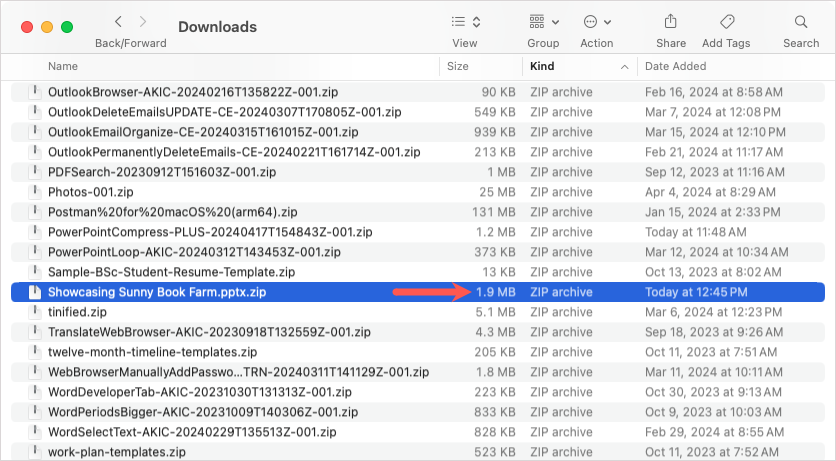
You can then send it to your recipient who can unzip and use the file.
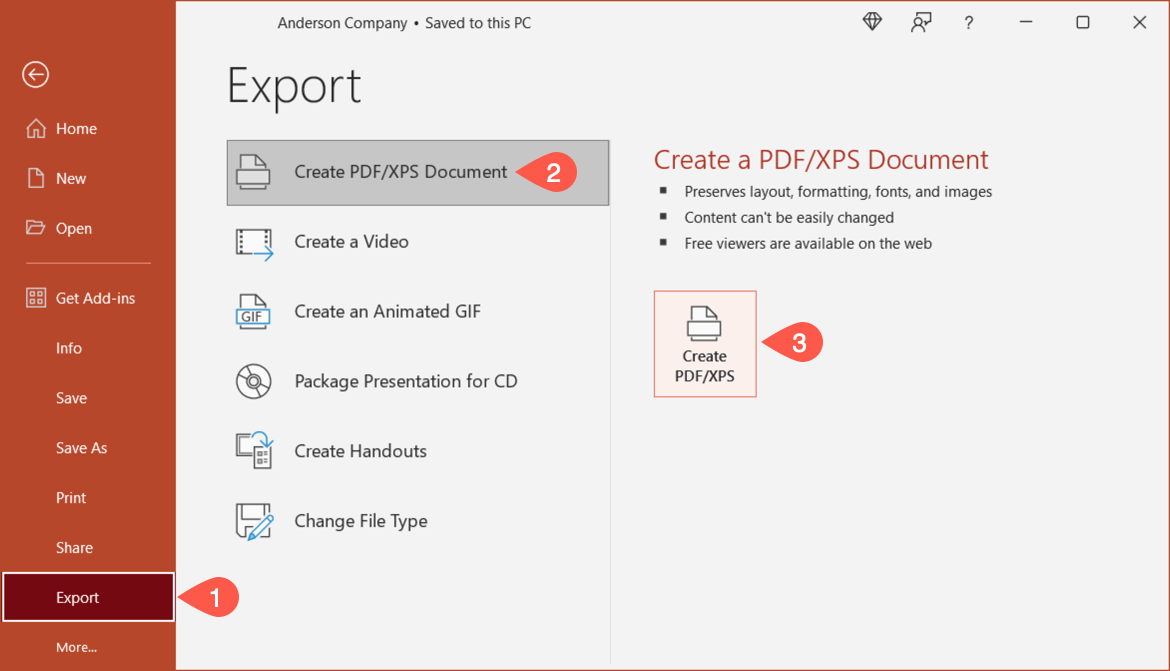
5. Compress the file as a PDF
One more option for compressing a PowerPoint slideshow is perfect if you want to share a copy that someone can simply review or print. You can do this by exporting it as a PDF file. You’ll still see your images, but audio and video files display as static elements. And keep in mind that this produces a document, not a slideshow.
Tip: You can also convert a PDF to PowerPoint for a quick start on creating a slideshow.
Save as a PDF on Windows
- On Windows, go to File > Export and choose Create PDF/XPS Document.
- Click Create PDF/XPS.
- Pick a file location, confirm the Save as type is PDF, optionally edit the name, and select the Optimize for type. Note that there is a Minimize Size choice.
- Click Publish to save the file.
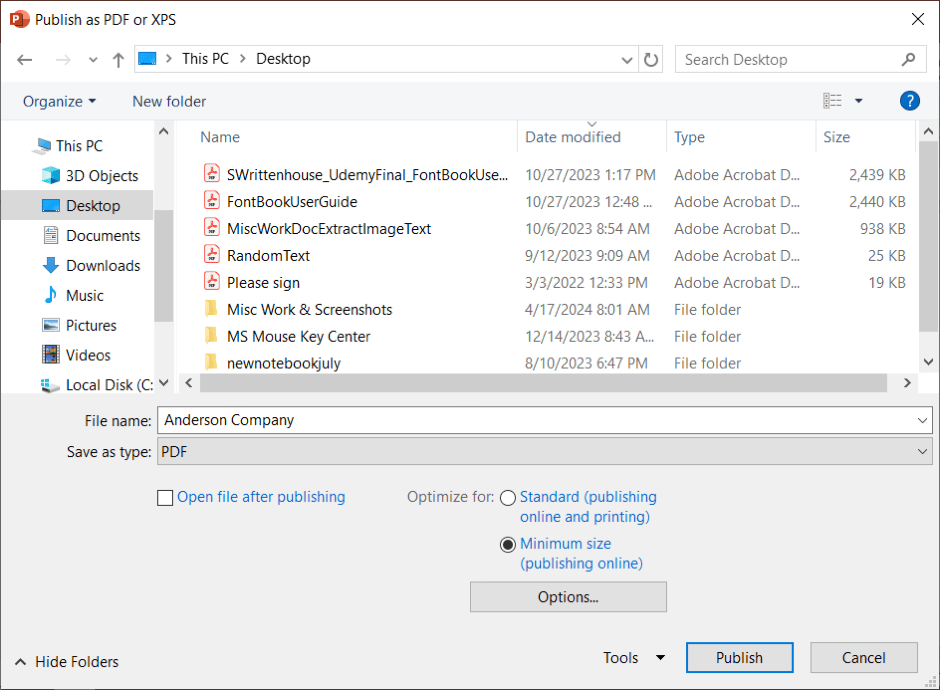
Again, the size of the PDF file depends on the length and elements in the slideshow.
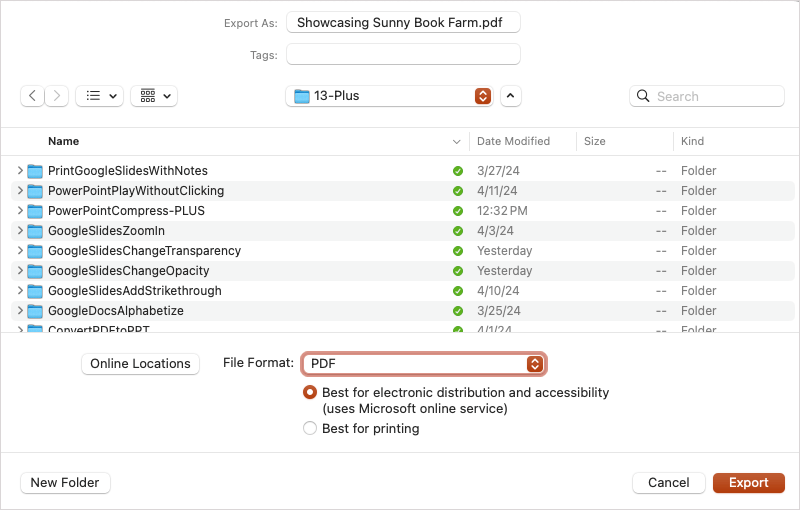
Save as a PDF on Mac
- On Mac, go to File > Export in the menu bar.
- Pick a file location, confirm the File Format is PDF, optionally edit the name, and select the quality type.
- Click Export to save the file.
Edit presentations with ease using Plus AI
Once you start making changes to a presentation, it can be difficult to still convey your message effectively. With Plus AI for Google Slides and Docs, you can get help with both the slide content and presentation appearance.
You can upload your existing presentation to Google Slides and use Plus AI to make changes. Then, download it to PowerPoint or consider sharing it directly from Google Slides to avoid the file size worries.
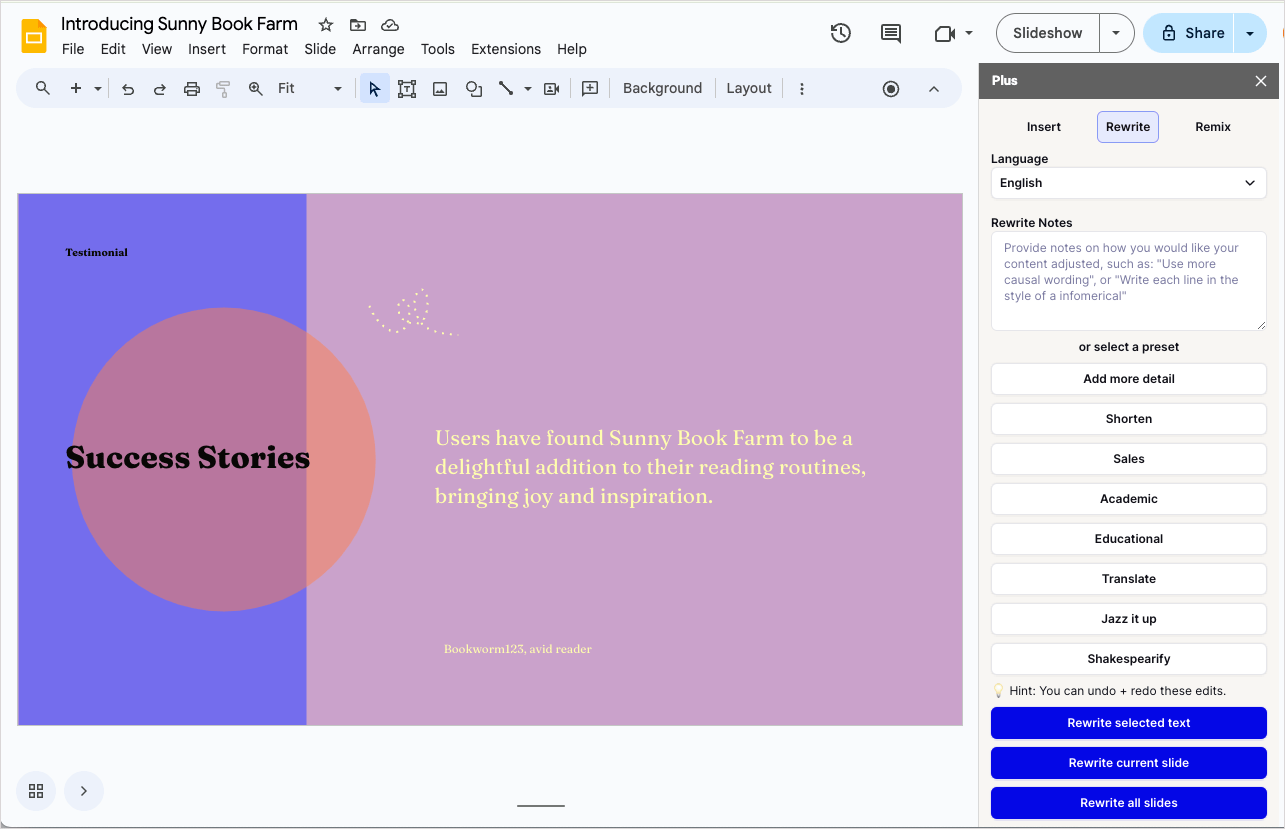
Using artificial intelligence, you can rewrite your current content, remix the slide layout for a better fit, or insert a slide with your custom instructions. Plus AI does it all including providing templates and themes, translations to any language, and simple tools for creating entire presentations.
Conclusion
Reducing the file size for a PowerPoint presentation can be challenging, so hopefully one or more of these methods works for you. And remember, you can save time and create amazing and informative presentations with Plus AI.
FAQs
Why is my PPT file so large?
There are many reasons your PowerPoint presentation file can be high in size. If you use photos, audio files, and videos, those media types can be large. You may also be using a template that has various images used in the design layout. Also, keep in mind the number of slides in your presentation --- 100 slides can create a larger file size than 10.
How do I compress a PowerPoint presentation online?
If you want to use an online compression tool for your PowerPoint file, this is a suitable option. There are many to pick from and most are available for free. Check out Zamzar, WeCompress, and YouCompress for a few options.
How do I send a PowerPoint that is too big in Outlook?
Even when you use compression methods for your PowerPoint slideshow, the size can still be too large to send via Outlook. In this case, consider uploading the file to an online storage service like OneDrive. From there, you can share a link to the file with others.